Close Menu

    Subscribe to Updates

    Get the latest creative news from FooBar about art, design and business.

    What's Hot

    Bathroom Wall Art Tutorial: Step-by-Step to Make & Personalize

    September 15, 2025

    Driftwood Wall Art: How to Make and Customize Unique Designs

    September 15, 2025

    How to Make Rosemary Oil for Hair and Customize It for Your Needs

    September 11, 2025
    Facebook X (Twitter) Instagram
    Facebook X (Twitter) Instagram
    Handicraft Magazine
    Subscribe
    • INTERIORS
    • EXTERIORS
    • HOUSE STYLES
    • KITCHENS & BATHS
    • Ideas
    • MAGAZINE
    • contact us
      • Privacy Policy
      • Advertise
      • Disclaimer
      • Terms and Conditions
    Handicraft Magazine
    Home»DIY and crafts ideas»How to Make and Customize a Craft Wood Keepsake Box
    DIY and crafts ideas

    How to Make and Customize a Craft Wood Keepsake Box

    HandicraftMagazineBy HandicraftMagazineAugust 4, 2025No Comments4 Mins Read0 Views
    Facebook Twitter Pinterest LinkedIn Tumblr Email
    Wood Keepsake Box
    Wood Keepsake Box
    Share
    Facebook Twitter LinkedIn Pinterest WhatsApp Email

    Introduction

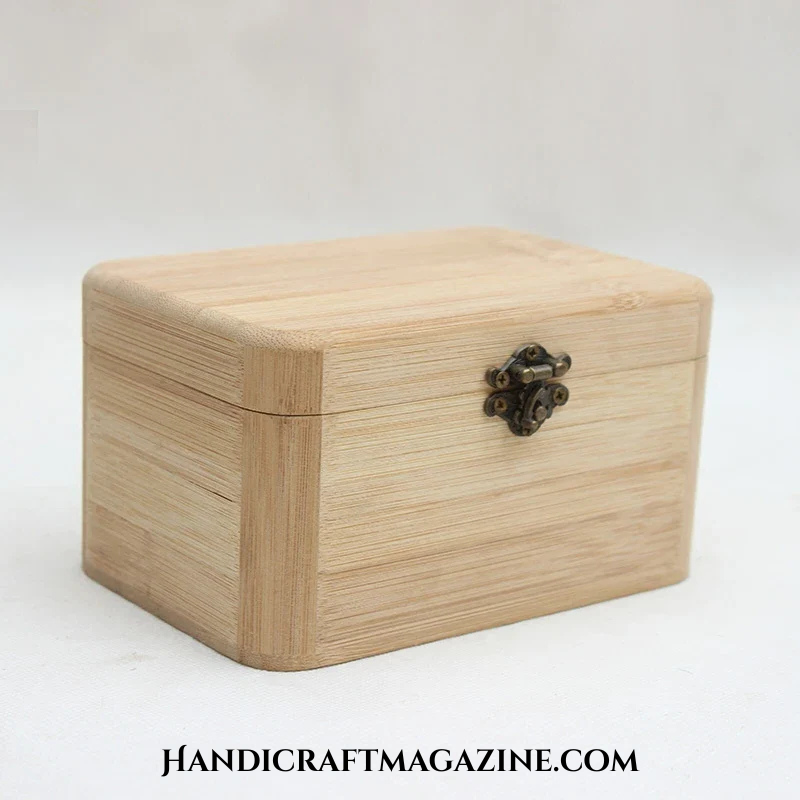
    Craft wood keepsake boxes are timeless pieces used to store treasured items. Whether for jewelry, letters, or small heirlooms, these boxes serve both functional and decorative purposes. Making your own craft wood keepsake box adds a personal touch and allows full control over design, size, and detailing.

    In this article, you’ll learn how to make a craft wood keepsake box from scratch. We’ll also explore ways to customize it based on your style or occasion. Whether you’re gifting or keeping it for yourself, the process is both satisfying and rewarding.

    Materials and Tools Needed

    To start, you’ll need a few basic woodworking tools and materials:

    Materials

    • Wood panels (pine, oak, or walnut are ideal)
    • Wood glue
    • Sandpaper (medium and fine grit)
    • Hinges and screws
    • Wood stain or paint (optional)
    • Varnish or sealant

    Tools

    • Saw (table or hand saw)
    • Clamps
    • Drill
    • Screwdriver
    • Ruler and pencil
    wood box alt="Keepsake Box" class="wp-image-8344" style="width:651px;height:auto"/>
    wood box

    Step-by-Step Guide to Making a Craft Wood Keepsake Box

    Step 1 – Measuring and Cutting the Wood

    Measure and mark your wood pieces for the base, sides, and lid. A standard size is 8x6x4 inches, but you can adjust as needed. Use your saw to cut the wood carefully, ensuring each piece is straight and uniform.

    Step 2 – Assembling the Box

    Apply wood glue to the edges of the side panels and attach them to the base. Use clamps to hold everything in place while the glue dries. Once set, attach the lid using small hinges and screws. Check alignment and smooth opening and closing.

    Step 3 – Sanding the Surfaces

    Use medium-grit sandpaper to smooth rough surfaces and edges. Follow with fine-grit sandpaper to give it a refined finish. Sanding helps prepare the surface for customization.

    How to Customize Your Craft Wood Keepsake Box

    Customization makes each keepsake box special and unique.

    Painting or Staining

    Choose a wood stain for a natural look or acrylic paint for a vibrant finish. Apply evenly using a brush, then let it dry completely. Add a clear varnish for protection and shine.

    Carving or Engraving

    For advanced customization, use carving tools or a wood-burning pen to add names, dates, or designs. These personal touches elevate the box’s value and meaning.

    Adding Decorative Elements

    Consider adding fabric linings, metal corners, or decorative knobs. These additions enhance both appearance and functionality.

    Where to Use a Craft Wood Keepsake Box

    A handmade keepsake box fits many purposes. Use it as a memory box, jewelry holder, wedding gift, or storage for baby keepsakes. Its charm lies in its versatility and handcrafted quality.

    Care Tips for Longevity

    To ensure your keepsake box lasts, keep it in a dry environment. Wipe with a soft cloth to remove dust. Reapply varnish every few years to maintain shine and protection.

    FAQs About Craft Wood Keepsake Boxes

    What wood is best for making keepsake boxes?

    Hardwoods like walnut, cherry, or oak are durable and attractive. Pine is also a good option for beginners.

    Can I make a keepsake box without power tools?

    Yes, it’s possible with hand tools, though it may take more time and effort.

    How long does it take to make a keepsake box?

    On average, it takes 4 to 6 hours, depending on complexity and drying times for glue and finishes.

    Is sealing the wood necessary?

    Yes. Sealing protects the wood from moisture and adds a polished finish.

    Adding Personal Stories to Your Craft Wood Keepsake Box

    To make your keepsake box even more special, include items that tell a story. You can add a small note explaining the meaning behind each object inside the box. Whether it’s a childhood trinket, a wedding memento, or a travel souvenir, personal touches make your keepsake box deeply meaningful. Use decorative paper, custom dividers, or engraved messages to elevate the emotional value of the box.

    Conclusion

    Creating a craft wood keepsake box is a fulfilling DIY project that results in a meaningful, personalized item. By following these steps and customization tips, you can craft a unique piece that lasts for years. Start simple, experiment with styles, and make it your own.

    handmade wooden keepsake boxes Keepsake Box personalized wood keepsake box Wood Keepsake Box
    Share. Facebook Twitter Pinterest LinkedIn Tumblr Email
    Previous ArticleHow to Make and Customize a Pearl Drop Necklace at Home
    Next Article How to Clean Wood Coffee Table (Easy Steps & Custom Tips)
    HandicraftMagazine
    • Website

    Related Posts

    Bathroom Wall Art Tutorial: Step-by-Step to Make & Personalize

    September 15, 2025

    Christmas Crafts: How to Make and Customize Holiday Creations

    September 5, 2025

    How to Make Sand Art: Easy DIY Guides and Tips

    August 26, 2025
    Leave A Reply


    Latest Posts

    Bathroom Wall Art Tutorial: Step-by-Step to Make & Personalize

    September 15, 20252 Views

    Driftwood Wall Art: How to Make and Customize Unique Designs

    September 15, 20250 Views

    How to Make Rosemary Oil for Hair and Customize It for Your Needs

    September 11, 20254 Views

    How to Create Jesus Art Painting & Customization Tips

    September 9, 20254 Views
    Stay In Touch
    • Facebook
    • Twitter
    • Pinterest
    • Instagram
    • YouTube
    • Vimeo
    Don't Miss

    How to Make Shampoo at Home | 3 Easy Steps to Make Your Own Shampoo

    By HandicraftMagazineAugust 27, 2025

    Introduction Learning how to make shampoo at home is a rewarding and practical skill. It…

    DIY Papercraft Man: Simple Steps to Make & Customize Your Model

    June 23, 2025

    6 Easy Steps to Customize a Shampoo Base at Home for Perfect Results

    February 5, 2025

    Subscribe to Updates

    Get the latest creative news from SmartMag about art & design.

    About Us

    Handicraft Magazine is your destination for handmade art, crafting tips, and artisan stories. We’re here to inspire and connect everyone who loves creativity.

    We are always open to new ideas, partnerships, and collaborations.

    Email Us: Handicraftmagazine.com@gmail.com

    Our Picks

    Bathroom Wall Art Tutorial: Step-by-Step to Make & Personalize

    September 15, 2025

    Driftwood Wall Art: How to Make and Customize Unique Designs

    September 15, 2025

    How to Make Rosemary Oil for Hair and Customize It for Your Needs

    September 11, 2025
    Most Popular

    How to Make Shampoo at Home | 3 Easy Steps to Make Your Own Shampoo

    August 27, 2025865 Views

    DIY Papercraft Man: Simple Steps to Make & Customize Your Model

    June 23, 2025250 Views

    6 Easy Steps to Customize a Shampoo Base at Home for Perfect Results

    February 5, 2025182 Views
    © 2025 Designed by Handicraft Magazine.
    • Home
    • Advertise
    • Terms and Conditions
    • Disclaimer
    • Privacy Policy
    • contact us

    Type above and press Enter to search. Press Esc to cancel.