Introduction
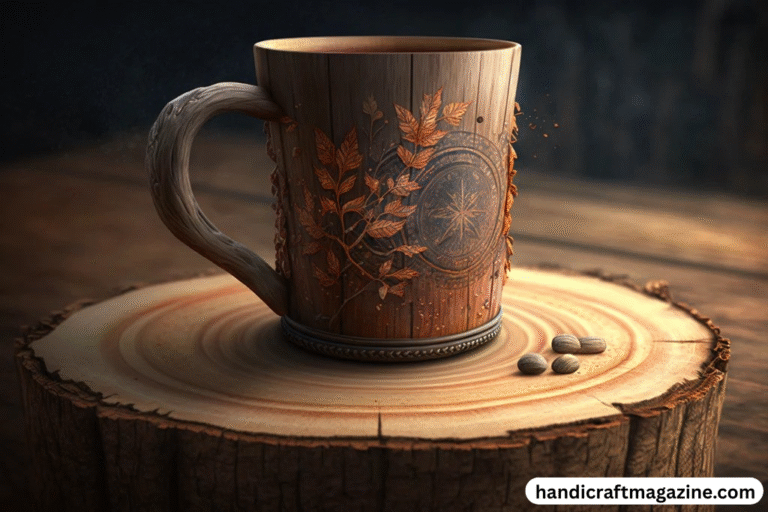
Dark wood holds a timeless beauty that instantly adds warmth and elegance to any kitchen space. When used for crafting cups, this material delivers both visual appeal and lasting strength. From everyday use to decor enhancement, cups made with dark wood carry charm and personality.
This article explores how dark wood is used for making cups, how you can customize them at home, and which types of wood work best. We’ll also walk through simple crafting steps, finishing options, and care tips to ensure your wooden cups stay in great shape for years.
The Appeal of Dark Wood for Cups
Dark wood types like walnut, rosewood, and mahogany bring a rich tone and smooth texture to handmade cups. These woods are dense and less porous, making them suitable for items that hold warm or cold liquids. Their fine grain patterns and natural oil content help maintain strength while adding a luxurious look.
Best Types of Dark Wood for Cup Making
Walnut Wood
Walnut is strong, lightweight, and has a deep chocolate brown tone. It’s easy to carve and finishes beautifully with oil or wax.
Rosewood
Known for its reddish-dark hues, rosewood offers high density and durability. It’s perfect for fine-detail carving and has a mild fragrance.
Mahogany
Mahogany cups are valued for their reddish-brown shine and long-lasting performance. The grain is even, which makes shaping easier during crafting.
Tools You’ll Need to Make a Wooden Cup
Creating your own cup requires basic woodworking tools. Here’s a quick list to get started:
- Wood lathe or carving knife
- Sandpaper (medium to fine grit)
- Wood glue (if pieces are joined)
- Food-safe wood oil or wax
- Safety gloves and eye protection
Steps to Make a Dark Wood Cup at Home
Step 1: Choose and Prepare Your Wood
Pick a solid block of dark wood and cut it to your desired cup size. Remove any rough edges.
Step 2: Shape the Cup
Mount the block on a lathe or use a carving knife to form the outer shape. Hollow out the inside slowly, ensuring even thickness.
Step 3: Sand the Surface
Smooth every inch using medium grit, then fine sandpaper. Keep checking for splinters or uneven edges.
Step 4: Apply Finish
Use food-safe oil or wax to protect the wood and enhance the grain. Let it absorb, then buff with a clean cloth.
Customizing Your Wooden Cup Design
Adding Handles
You can attach a carved wooden handle using wood glue. Make sure it’s shaped comfortably for grip and balanced for weight.
Engraving Patterns
Use a wood-burning pen or hand tool to add initials, floral motifs, or simple borders for a personal touch.
Mixing Materials
Add a metal base or resin coating for a modern twist. Just ensure the materials are food-safe and well-fitted.
Care and Maintenance Tips
Dark wood cups require attention to last. Here are some key care practices:
- Avoid soaking them in water.
- Wash gently by hand with mild soap.
- Dry thoroughly with a towel after washing.
- Reapply oil every few months to keep the wood hydrated and sealed.
- Store away from direct heat or sunlight.
Why Dark Wood Cups Are a Worthy Addition
Besides function, dark wood cups can serve as display pieces, conversation starters, or handmade gifts. Their natural tones suit rustic, modern, and minimalist interiors alike. Whether lined up in an open kitchen shelf or used for your morning tea, they bring comfort and creativity to daily rituals.
Crafting your own cup also fosters a sense of pride and connection with handmade artistry. It’s not only about having a cup—it’s about shaping something that reflects you.
FAQs About Dark Wood Cups for Your Kitchen
Q1: What is the best dark wood for making cups?
Walnut, rosewood, and mahogany are top choices for crafting dark wood cups due to their strength and smooth finishes.
Q2: Are dark wood cups safe for drinking?
Yes, as long as you finish them with a food-safe oil or wax, dark wood cups are safe for both hot and cold beverages.
Q3: Can I make a dark wood cup at home without a lathe?
Yes, you can use a carving knife and basic hand tools if you don’t have a wood lathe. It requires patience and safety measures.
Q4: How should I clean my wooden cups?
Handwash with mild soap and water, then dry immediately. Avoid soaking or putting them in a dishwasher.
Q5: How often should I oil my wooden cup?
Reapply food-safe oil every 2–3 months to keep the wood sealed and prevent cracking or drying.
Q6: Can I add decorations or engravings to wooden cups?
Yes, you can burn designs with a wood-burning tool or carve patterns for a personalized touch.
Q7: What are the benefits of using dark wood for cups?
Dark wood adds warmth, elegance, and durability. It enhances both functional use and home décor appeal.
Conclusion
Dark wood used for cups blends beauty and durability in a unique, handcrafted form. From choosing walnut or mahogany to shaping and personalizing your cup, the process is rewarding and creative. Whether you’re a beginner or an experienced woodworker, making your own wooden cups offers a satisfying blend of design and function.
Start small, explore your style, and let dark wood tell your story—one sip at a time.
